
You've got a few open days on the Big Island, a certification card somewhere in your luggage, and a choice between morning reefs, manta rays after dark, and a night dive into open ocean. The difficulty isn't finding an exciting trip. It's choosing one that matches your skills, the day's conditions, and the kind of underwater experience you want.
For scuba on Hawaii's Big Island, start with Kona, then judge each trip by its dive plan rather than its wildlife promises. A sheltered reef with an uncomplicated exit can be the right first dive. A manta encounter deserves scrutiny beyond whether animals appear, especially when crowding affects your view and their feeding space.
Big Island Scuba Options and Certification Rules
Big Island dive experiences compared
| Experience | Best for | Setting | Certification needed |
|---|---|---|---|
| 2-Tank Morning Dive | Certified divers wanting reef, lava tube and arch dives | Boat, morning | Certified Open Water, 60 ft (18 m) with a buddy |
| Manta Ray Night Dive | Divers and snorkelers wanting manta encounters after dark | Boat, night | Open Water for scuba; none for snorkeling, confirm at booking |
| Black Water Night Dive | Experienced night divers wanting open-ocean drift dives | Boat, night | Certified with suitable night and open-water experience, confirm at booking |
| Premium Advanced 2-Tank Trip | Certified divers seeking deeper, remote sites | Boat, day | Certified plus advanced experience; depth limited by training and the operator's plan |
| Shore dive at Old Kona Airport | Independent divers and photographers | Shore, cove entry | Certified, plus rule compliance |
| Morning Introductory Scuba Dive | Beginners with no certification | Boat, shallow reef | None, instructor-led |
For most of our regular guided charters, we require at least an Open Water Diver certification from a recognized agency such as PADI, SSI or NAUI, which allows diving to 60 feet (18 meters) with a buddy. Bring your C-card, whether physical or an accessible digital version. A booking confirmation doesn't replace proof of certification.
That's an operator participation requirement, not a claim that holding a card makes every Big Island dive suitable. Depth, overhead environments, darkness, current and entry difficulty require separate consideration. Choose the experience you can manage comfortably, not the most adventurous row your certification appears to permit.
Choose by skills, not scenery alone
A morning reef charter is the sensible starting point for many visiting divers. You can establish weighting, get comfortable with rental equipment, and learn how the boat crew handles entries and exits before adding darkness or more demanding conditions.
Lava formations need particular care. An arch with a broad, unobstructed opening isn't the same as an enclosed tube, and an attractive opening isn't an invitation to enter. Follow the guide's route and stay outside any overhead environment beyond your training.
For an advanced trip, a certification title alone won't answer the readiness question. The useful details are whether you can hold depth without a visual reference, manage your gas independently, and complete an ascent without needing to follow the reef upward.
Practical rule: Pick a dive that leaves you enough attention for your surroundings. If all your attention goes into equipment and buoyancy, reduce the task load before adding a camera, darkness or depth.
Starting, restarting or finishing training
Non-certified visitors need an introductory experience rather than a place on an ordinary certified-diver charter. An instructor teaches breathing, equalization, equipment use and basic responses in a calm, sheltered setting before proceeding to a shallow reef dive. That supervised introduction isn't a substitute for full certification or permission to dive independently afterward.
If you're certified but rusty, arrange a refresher or reactivation before committing to a demanding boat trip. Trouble remembering regulator recovery or buoyancy adjustments is easier to resolve in a controlled setting than while a group waits at the descent point.
Referral training serves a different purpose. If you've completed eligible coursework and confined-water instruction elsewhere, you may be able to finish your open-water training locally. Send your training documents before travel so an instructor can confirm compatibility and what remains unfinished.
Use the Big Island scuba certification guide to distinguish initial training, referral completion and reactivation. These solve different problems, so don't book them interchangeably.
Mixed groups should also identify who will scuba dive and who will snorkel. Surface participation doesn't require scuba certification, but swimming comfort, ocean conditions and the trip's supervision arrangements still matter.
Before paying:
- Check your certification card and agency. Make sure your proof is accessible.
- Review your logbook. Note your recent dives and the conditions you handled.
- Choose your route. Match the table to your present abilities, not past ambitions.
- Confirm eligibility. Give the operator your actual experience and resolve any training requirements first.
Best Seasons and Visibility on the Kona Coast
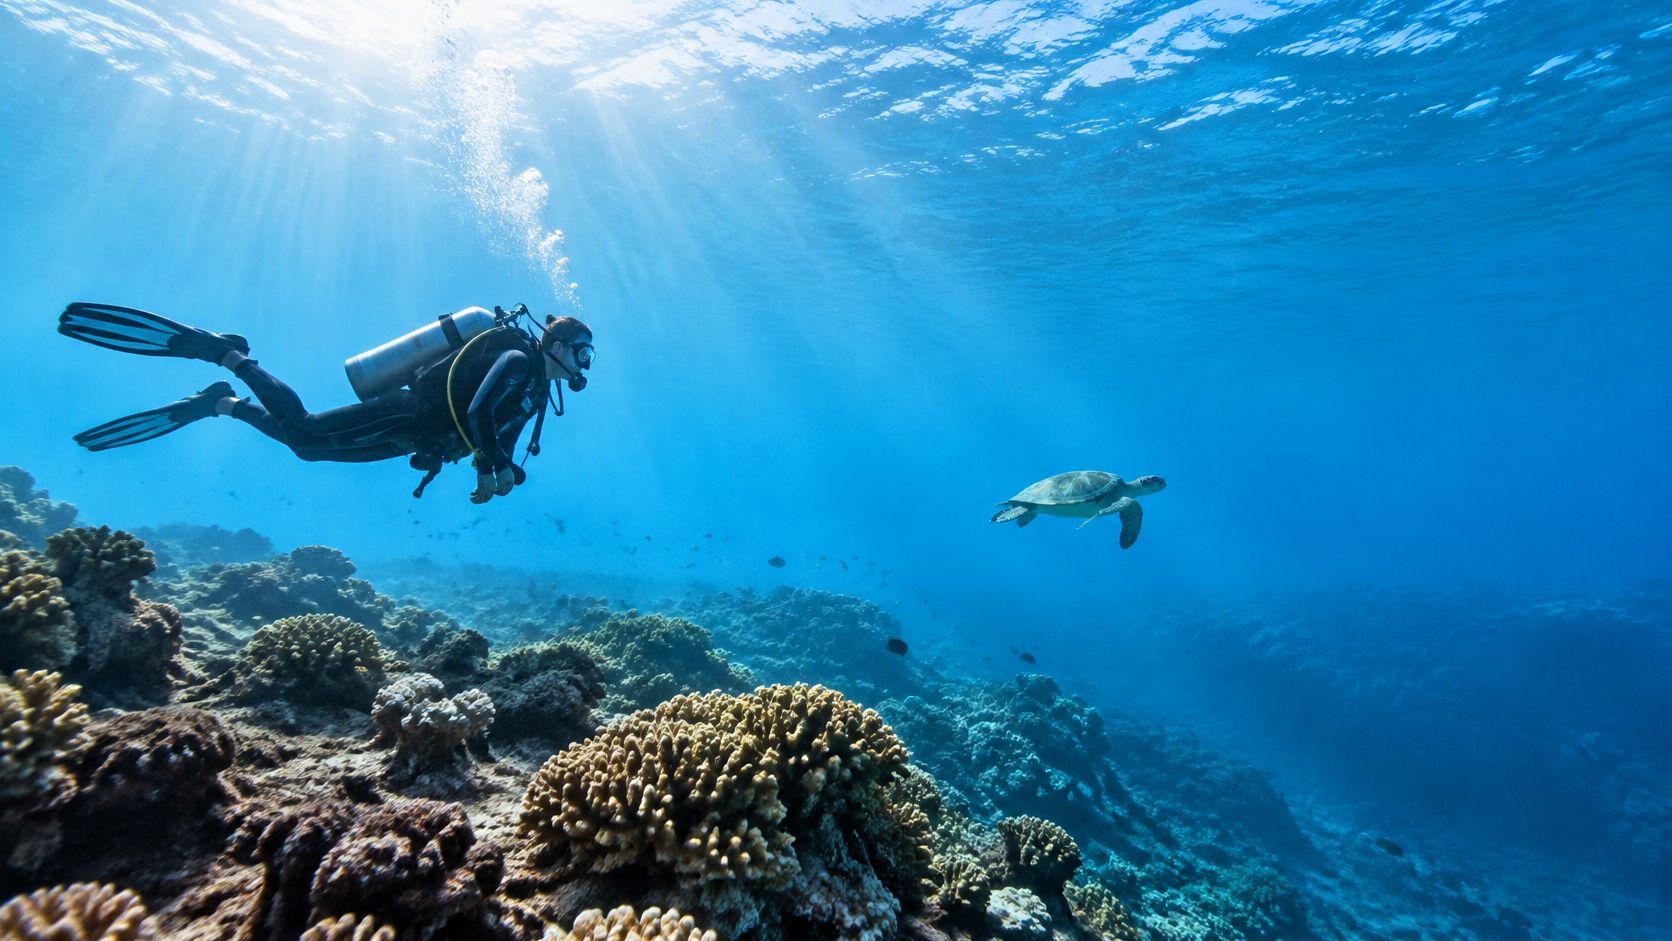
Kona offers dependable opportunities through much of the year, but plan with ranges rather than guarantees. The Kona regional diving guide gives typical visibility benchmarks of 18–30 m (60–100+ ft) and water temperatures around 24–27°C (75–81°F).
Those are regional planning ranges, not a forecast for your entry point. Swell direction, wind, runoff, suspended sediment and local current determine what you'll encounter.
Kona seasons, conditions and best dive types
| Season | Typical conditions | Visibility and water | Best dive types |
|---|---|---|---|
| Summer (May to September) | Usually calmer leeward water | Strong visibility; use the regional temperature range above | Morning reef dives and manta night dives |
| Winter (November to March) | North and west swell can roughen the surface | Clarity can decline after rain; use the regional temperature range above | Guided boat dives in protected areas |
| Rainy spells, any season | Runoff and turbidity near the coast | Temporarily reduced clarity | Operator-confirmed sites rather than an assumed shore entry |
What the calendar can't tell you
Summer is a reasonable starting preference for calmer leeward diving, but don't build a shore-entry decision around the month. A distant swell can make a lava shelf awkward even when the weather overhead looks inviting.
Winter requires more flexibility around exposed sites. A boat crew may be able to move to a protected location, whereas an independent shore team has to decide whether its chosen entry and exit remain usable.
Rain creates another distinction: clear weather today doesn't necessarily mean clear coastal water today. Runoff can leave poor visual references after the rain itself has passed. The Big Island scuba visibility guide is useful for understanding that difference before choosing between shore and boat diving.
Make the morning check specific
Ask about entry and exit conditions, surge, current direction and the planned alternative. “Is the bay calm?” is too broad because an exposed point outside that bay may behave differently.
- For reef divers: Favor a manageable descent and exit over a more dramatic site.
- For photographers: Ask whether surge will make stationary subjects difficult to approach without reef contact.
- For shore teams: Assess the return route with equipment on, not just the ease of getting into the water.
- For anyone who gets cold: Choose thermal protection for the full planned bottom time and repeated exposure.
Clear water can also distort your sense of distance. Keep navigation and gas checks deliberate even when you can see the boat or shoreline easily.
Choose your travel season around your priority, whether that's clarity or relaxed morning reef diving, then leave a backup day. Flexibility is more useful than treating any season as a guarantee.
Manta Ray Night Dives and Where to See Them Best
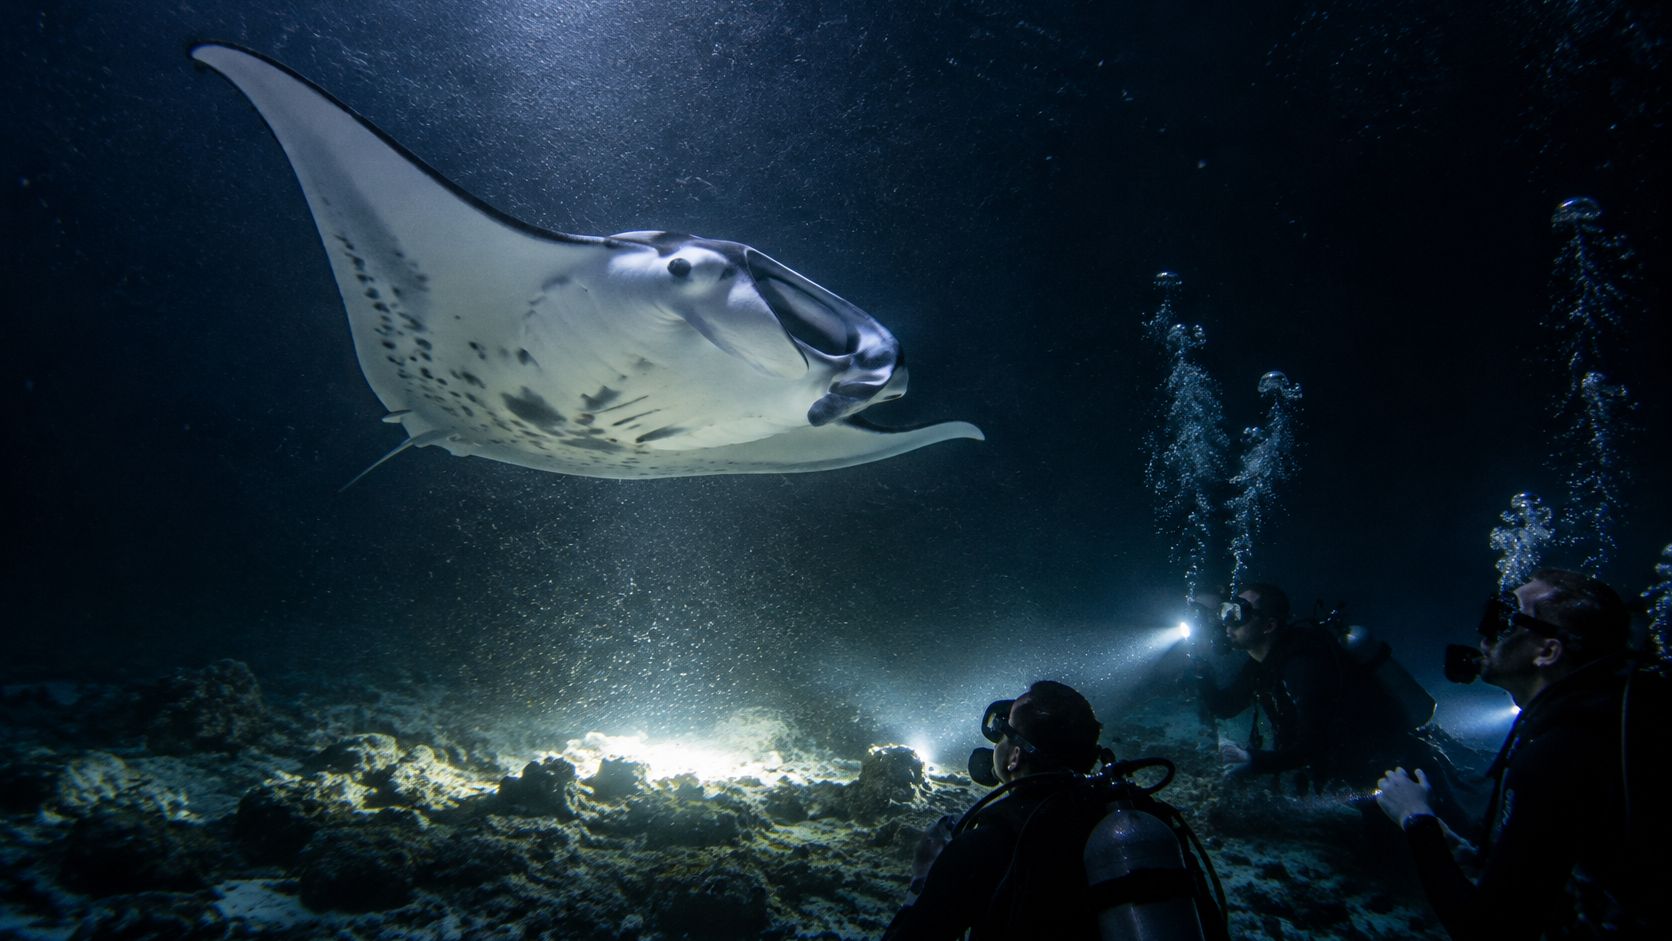
The manta ray night dive is Kona's signature after-dark experience, but the busiest gathering isn't automatically the best dive. What matters is an unobstructed viewing position, controlled movement around the feeding area, and enough room for the animals to pass without avoidance.
This is an unusually well-documented wildlife encounter. A University of Hawaiʻi study published in 2025 examined more than 23,000 sightings involving 167 individually identified reef manta rays and found consistently larger aggregations at Garden Eel Cove than at Keauhou.
Why I'd choose Garden Eel Cove
Garden Eel Cove is the superior choice for this dive because its protected location, better viewing area and better surrounding reefs support a more controlled experience. Its larger documented feeding aggregations strengthen that recommendation, although no location can promise wildlife on demand.
The attraction is plankton concentrated in the lights, not a scheduled animal performance. Judge the trip by how the crew organizes the viewing area and handles poor conditions, not by how confidently someone promises a close pass.
For trip planning, compare the manta ray dive and snorkel tour with the practical details in the Kona night manta dive guide.
Crowding is part of the booking decision
A 2024 SFGATE report described nights with more than 290 people in the water and proposed rules limiting commercial permits to 24 per location, each operator to 60 passengers per 24-hour period, and supervision to one guide per eight participants. Those were reported proposals, not established operating limits to assume are in force.
Mantas may change course, avoid swimmers or interrupt feeding during crowded encounters. Unmeasured long-term effects aren't evidence that unlimited tourism pressure is harmless.
Ask how the operator maintains a clear feeding corridor, separates groups and manages movement near boats. A smaller booking group can still arrive at a crowded site, so ask about the whole viewing environment as well as your own party.
Follow the viewing geometry
The NOAA-hosted voluntary wildlife interaction standard directs operators to explain Manta Pacific's Manta Ray Viewing Guide and sets out practical positioning:
- Follow the divemaster: Divers and videographers move into the designated light circle.
- Protect the bottom: Lights belong on sand or rubble, with room to avoid sitting on live coral.
- Aim correctly: Divers hold lights above their heads and shine upward; snorkelers shine downward.
- Keep the surface boundary: Snorkelers stay above the feeding area rather than diving into it.
- Control your bubbles: When practicable, time breathing so a passing manta doesn't receive bubbles directly underneath it, without holding your breath.
Never reach for a manta or reposition across its path for a closer view.
When considering Kona Honu Divers, read reviews for descriptions of briefings, organization and guide attentiveness, not just animal counts.
Before booking, ask about group size, guide ratio, less crowded departure options, and what happens when sightings are poor. A clear answer is more useful than a sighting promise.
Blackwater, Pinnacles and Advanced Dive Options
On a typical blackwater dive, your light illuminates small drifting animals while everything beyond the beam disappears into darkness. There's no reef slope to establish your position and no sandy bottom to settle toward. You have to monitor depth deliberately while resisting the urge to follow an interesting subject away from the group.
The Black Water Night Dive is an open-ocean experience over deep water, not a more dramatic version of a shallow reef night dive. Plankton and drifting animals enter the illuminated water, giving you fleeting opportunities to observe forms that can be difficult to recognize or photograph.
Darkness changes the workload
Consider a diver who is comfortable on daylight reefs but relies on the bottom for buoyancy feedback. In blackwater, that reference disappears. Looking through a camera viewfinder can make the problem worse because the subject may be moving vertically too.
The right response isn't stronger finning. Establish neutral buoyancy, check the computer, maintain awareness of the guide and follow the briefing's positioning system.
Compare the Black Water Night Dive trip with the preparation described in the Kona blackwater diving guide. Confirm the actual participation requirements before assuming that previous night diving alone qualifies you.
Comfort in darkness means you can solve a small problem without losing depth, orientation or contact with the group.
Pinnacles require a different kind of discipline
Volcanic pinnacles rising from deeper seafloor offer dramatic relief, reef fish and opportunities to see passing pelagic animals. The trade-off is that depth and current can limit how long you can remain in the most interesting area.
Remote reefs may offer excellent scenery, but distance from the harbor doesn't make a site suitable for every diver. Deeper and drift dives require reliable gas checks, controlled ascents and attention to the guide's route.
The Premium Advanced 2-Tank Trip is the relevant option for certified divers seeking remote, pristine sites, including deeper and drift diving. Don't treat “advanced” as permission to exceed your training or the agreed plan.
Use your logbook to test readiness:
- Comparable conditions: You've handled dives with similar depth, current or exposure.
- Recent night experience: Darkness doesn't consume all your attention.
- Stable buoyancy: You can pause without drifting upward or dropping.
- Drift competence: You can maintain group position without grabbing the bottom.
- Computer familiarity: You understand the display and can monitor it while task-loaded.
Kona Honu Divers reviews can help you evaluate how clearly the crew communicates these expectations.
Compare your recent logbook entries against that checklist and send the relevant details before booking. Honest experience information helps the operator confirm whether the trip is appropriate.
Shore Entries, Protected Coves and Access Rules
At Old Kona Airport, snorkelers and shore divers commonly use the partially protected cove at the beach's northwestern end. It's a useful example of why entry geography matters: shelter can make access more manageable, but it doesn't remove surge, navigation or boat-awareness responsibilities.
Shore diving suits independent buddy teams and photographers who want control over pace. The trade-off is that you also take responsibility for surface signaling, route selection, equipment transport and deciding not to enter.
Understand the protected area
The Hawaiʻi Division of Aquatic Resources' Old Kona Airport MLCD guide describes boundaries extending 500 yards seaward from designated points, a No Boating Zone, and noncommercial state-mooring use limited to three hours per boat per day, first come, first served.
The district covers waters offshore of the park and adjacent private properties toward Kailua Lighthouse. Use the official boundary map rather than assuming that the beach access defines the entire protected area.
Within the district:
- Leave organisms untouched: Removing or injuring marine life, including coral, shells, algae and limu, is prohibited.
- Leave the substrate intact: Don't take or alter sand, rock, coral or other geological features.
- Don't feed wildlife: Feeding marine organisms or using attractants is prohibited.
- Respect commercial restrictions: Commercial dive and tour operations need the required permit to operate from shore or moorings.
These rules rule out seemingly small actions such as collecting an empty-looking shell or moving reef material to improve a photograph.
Plan the surface marker before entering
The Hawaiʻi boating division's snorkeling and diving rules require a red-and-white diver flag, surfacing within 100 feet of it except in an emergency, illumination between sunset and sunrise, and boats to avoid flags and operate at no-wake speed within 200 feet.
The narrower stream surfacing limit is 50 feet, as specified in the state diving regulations. For ocean shore dives, plan how your marker will remain relevant to your position rather than leaving it somewhere convenient and swimming away.
A flag doesn't create a protected bubble around you. Watch traffic, avoid navigation-channel conflicts, and understand how current will affect the marker and your return route.
Use the Big Island shore-diving guide to narrow your options, then make a site-specific plan:
- Inspect conditions: Watch the surface and surge before gearing up.
- Choose both routes: Identify the entry, normal exit and an alternative.
- Check restrictions: Confirm protected-area boundaries and local access rules.
- Leave your plan ashore: Tell someone where you're diving and when you expect to return.
If you can enter but can't confidently describe how you'll get out, choose another site.
Gear, Rentals and the Dive Day Routine
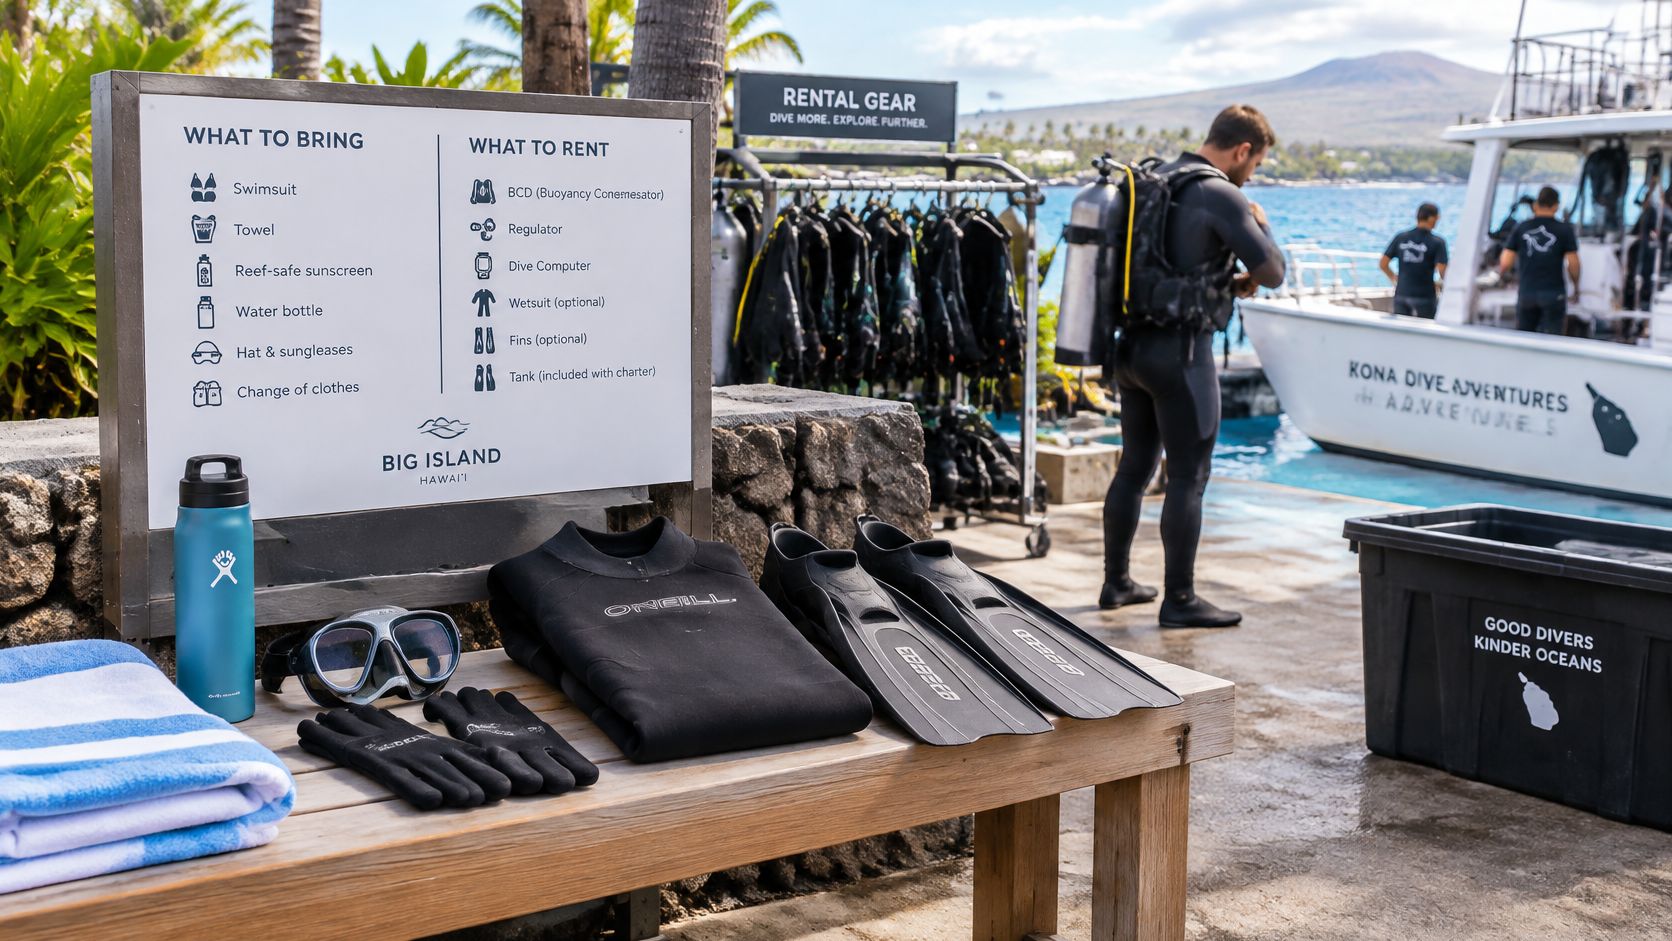
Pack the equipment that benefits most from familiarity, and rent bulky items when that makes travel easier. A well-fitting mask and a computer you understand are usually more valuable than carrying unfamiliar equipment because you own it.
We size divers for needed rental gear during check-in. Give yourself time to check fit and operation rather than treating equipment setup as something to finish while the boat prepares to leave.
What belongs in your bag
- Personal essentials: Certification proof, logbook, swimsuit, towel and drinking water.
- Fit-sensitive equipment: Your mask and appropriate thermal protection, if you already have reliable favorites.
- Monitoring equipment: A familiar dive computer; if you need one, request it when booking so we can confirm availability and any small extra cost.
- Independent-dive equipment: A suitable flag system, surface marker and the skills to deploy your equipment correctly.
- Night equipment: A primary light, backup light and knowledge of the agreed signals.
Secure hoses, gauges and accessories close to your body. The Hawaiʻi fishing regulations prohibit taking, breaking or damaging stony coral, including reef and mushroom coral, so equipment configuration matters as much as careful finning.
How the day runs
Our typical dive day follows a practical sequence:
- Arrival and setup: Get fitted, assemble equipment and complete buddy checks.
- Site briefing: Listen for conditions, entry style, the exit plan and the alternative if circumstances change.
- The first dive: Start at the deeper or more condition-sensitive site.
- Surface interval: Rest, hydrate and discuss adjustments before re-entering.
- The second dive: Follow with a more relaxed profile suited to the day.
The briefing isn't just a description of fish and scenery. Know how to end the dive, where to surface and what to do if the planned exit becomes unsuitable.
Snorkelers and ride-alongs can join our dive boat trips. Tell us when booking if your party includes snorkelers so the reservation reflects everyone's intended activity.
We strongly recommend dive insurance. Read the policy for diving-related medical care, evacuation and exclusions; don't assume ordinary travel cover includes them, or that equipment cover is automatically included.
Make your packing list, identify rentals, confirm sizing and review coverage before travel. For independent dives, use the shore-entry requirements to plan the flag system rather than treating it as an optional accessory.
Underwater Photography Tips for Kona Dives
A good Kona photograph starts with a stable diver and a subject that doesn't need to change its behavior for the shot. Choose a manageable setup before adding strobes, long arms or extra lights that increase drag and task loading.
Build the photograph around the dive
Plan the light. At a manta viewing area, work within the divemaster's positioning instructions rather than creating a separate lighting station. Keep equipment on approved sand or rubble and never sit on live coral to obtain a lower angle.
Protect your buoyancy. At a surge-affected site, wait for a stable position instead of fighting toward the subject. If you can't hold clearance from the reef without using your hands, put the camera aside and regain control.
Choose clearer water. Ask about current clarity before committing to a shore entry after rain. Moving closer reduces the water between lens and subject, but it doesn't justify entering murky conditions that compromise navigation or buddy contact.
Give animals an exit. Let a manta or turtle leave the frame. Don't chase, intercept or surround an animal because your first composition didn't work.
Secure the entire rig. Check strobe arms, clips and the bottom of the housing, not just your fins. A camera dangling below you can strike reef material while your body appears well clear.
Make a buddy agreement. Set shared turnaround criteria and decide how you'll get each other's attention. Check time, gas, depth and position between shooting sequences, and maintain awareness of the surface-marker system.
Choose fewer tasks
For blackwater photography, practice camera controls without looking at the buttons before entering the water. For reef photography, start with subjects that let you stop at a comfortable distance without maneuvering into a confined space.
A missed photograph is a better outcome than lost buddy contact, damaged coral or an interrupted feeding pass.
Book Your Kona Dive and Confirm the Details First
Evaluate any operator by the details that affect the dive, not just the photographs on its booking page. A clear explanation of supervision and cancellation decisions tells you more than a list of possible animal encounters.
Before paying, get answers to these questions:
- Group size and guides: How many participants will share your in-water group, and how are different experience levels handled?
- Equipment servicing: How is rental gear maintained, and what happens if an item doesn't fit or function during setup?
- Poor conditions: Who decides whether to change sites, postpone or cancel?
- Cancellation terms: What happens when you cancel, when the operator cancels, or when the trip runs without the hoped-for wildlife?
- Safety approach: How are separation, an early ascent and a diver needing assistance handled?
Use reviews to check practical details
Kona Honu Divers is a practical choice for planning across different experience levels. The Kona Honu Divers website identifies the business as Hawaii's highest-rated and most-reviewed dive shop, and we were voted best dive operator in Kona, Hawaii.
Use that reputation as a starting point rather than a substitute for trip matching. Look for review descriptions of clear briefings, equipment help, attentive supervision and sensible responses when conditions weren't ideal.
Compare the full Kona diving tour lineup against your certification, recent experience and preferred setting. Send your last-dive information and any concerns about entries, buoyancy or darkness before making the reservation.
Confirm the details that can disrupt a trip
Check the meeting location, check-in instructions, rental arrangements and what your companions will do while you dive. Review medical participation requirements early enough to resolve any need for clearance before arrival.
Also plan flights and drives to altitude around your diving. Follow your training, computer guidance and appropriate medical advice rather than squeezing a mountain excursion into an uncertain post-dive window.
Book the morning reef dive first if you're unsure how comfortable you'll feel in local conditions or rental equipment. Once that plan is settled, add the manta night dive with a clear understanding of viewing arrangements, crowding and cancellation terms.
Kona Honu Divers offers morning reef trips, manta ray night dives, advanced excursions and training for visitors exploring Hawaii's Big Island underwater. Visit Kona Honu Divers to choose a trip that matches your experience, confirm the participation details and reserve your first Kona dive.